
Introduction
Sometimes we require to develop scheduler job for Dynamics 365 CE online. Currently we have different options to implement scheduler for Dynamics 365 CE online for example using workflow, Power Automate, Azure etc. In this article we are going to discuss how we can use Azure time trigger to develop scheduler for Dynamics 365 CE. Let’s say we have requirement to generate entity record on 1 day of every month, let see how we can do this step by step.
Here are the things you need
1. Access to Dynamics 365 CE environment
2. Azure subscription
3. Visual Studio 2017 or later
Solution
First we are going to create Azure function trigger using Visual Studio. We have written articles about developing Azure integration by writing code in Azure portal, you can check it here.
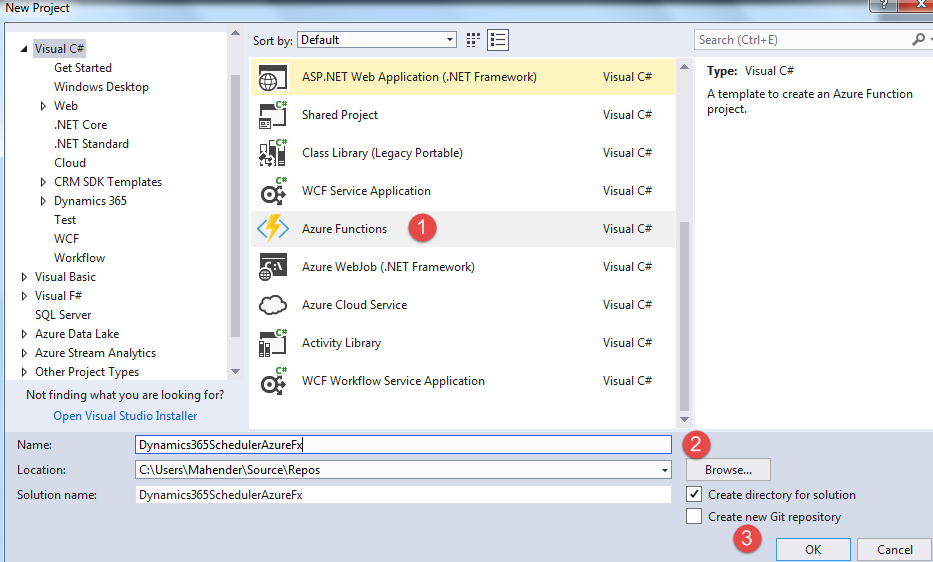
1. Start Visual Studio (We are using Visual Studio 2017) ->New Project and select Azure Function. Provide name for your Azure Function and click on Ok.
2. Select Azure Timer Trigger and pay attention to Azure Function version it should be V1, currently V2 is not supported.

Note: Make sure to check your Azure Function project Target framework, it should be 6.2 or later
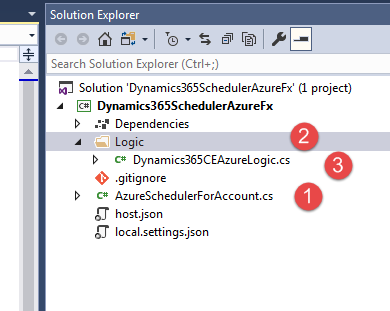
3. We have modified our Azure Function project like following, we renammed function class, added a new folder and added a new class where we will be writing our logic to connect to Dynamics 365 CE.
4. Now let’s add required assemblies to our Azure Function, right click on the project and select Manage Nuget Packages, we need add following two references


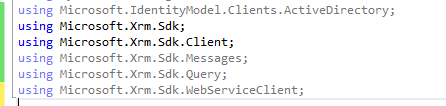
5. Now let’s add following references to our logic class
6. Now we need to add following code in our log class
  private static OrganizationServiceProxy GetDynamicsCRMService() {
   ServicePointManager.SecurityProtocol = SecurityProtocolType.Tls12;

   IServiceManagement < IOrganizationService > orgServiceManagement = ServiceConfigurationFactory.CreateManagement < IOrganizationService > (new Uri("https://Dynamics365OrgName.crm8.dynamics.com/XRMServices/2011/Organization.svc"));

   AuthenticationCredentials authCredentials = new AuthenticationCredentials();
   authCredentials.ClientCredentials.UserName.UserName = "Dynamics365UserName";
   authCredentials.ClientCredentials.UserName.Password = "Password";

   AuthenticationCredentials tokenCredentials = orgServiceManagement.Authenticate(authCredentials);

   OrganizationServiceProxy service=new OrganizationServiceProxy(orgServiceManagement, tokenCredentials.SecurityTokenResponse);

   service.Timeout = new TimeSpan(1, 30, 0);  //for longer run

   return service;

  }
  public static void GenerateAccountRecords() {
   OrganizationServiceProxy service = GetDynamicsCRMService();
   for (int i = 0; i <= 10; i++) {
    Entity _account = new Entity("account");
    _account["name"] = "Sample Account" + i;

    service.Create(_account);

   }

  }
In the first method we are created connecting to Dynamics 365 CE organization using hard coded user name and password, this is for the demo purpose, we can use application user as well to connect to Dynamics 365 CE, please refer our detailed article on how to use application user to connect to Dynamics 365 CE.
Now we need to call this method from our azure function, we can use following to call it

If you will notice that we are using RunOnStartup = true which runs Azure Function once after as soon as it is started.
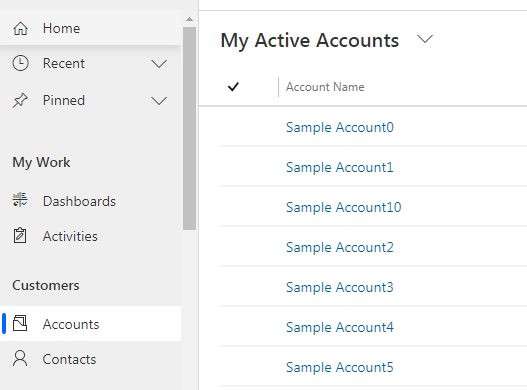
Now we are ready to test our Azure Function trigger, press F5 and test, once this is executed we should be able to see sample data created in Dynamics 365 CE like below:
Summary
In this articles we learned how we can integration Azure with Dynamics 365 CE and can built scheduler for Dynamics 365 CE. Keep in mind by default Dynamics 365 CE API timeout after 10 minute but we can change the timeout limit using Timeout property, for our demo we set it to 30, you can change it based on your requirement.