
In our last web API articles, we discussed about using web API actions, today we are going to discuss about calling our custom actions using web API. If you are new to action you can refer this KB to know about actions.
Let’s take a scenario that we want to design one action for our custom event entity to approve event based on it’s budget field value, for example if budget is more than 50000 then it will be approved otherwise not. This action will have only one output parameter, which will return true or false based on event is approved or not. So let’s design our action first, using following steps:
1. Navigate to Settings->Customizations->Customize the system.
2. Navigate to Components->Entities->New under solution and create a custom Event entity with two below custom attributes:
Name Data Type
Event Approved Two Options
Event Budget Currency
3. Place these field over Main form and Publish your customization.
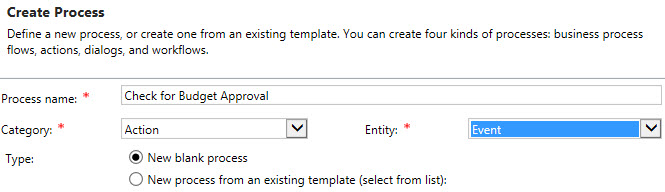
4. Navigate to Settings->Processes->New and use following details and click on Ok.
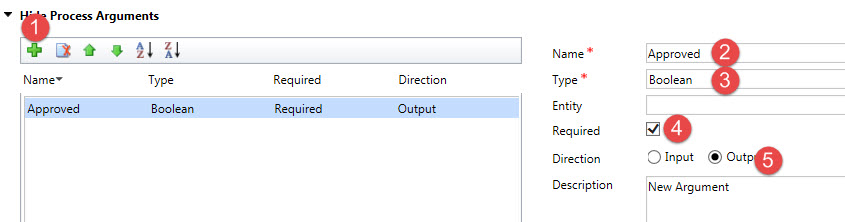
5. Setup an output argument using following details:
6. Click on Add Step drop down button and add a Check Condition step.
7. Configure this steps using following condition and click on Save and Close button:

8. Click on the row immediate after Check Condition and add an update step.
9. Click on Set Properties button and set Event Approval to Yes, like below:
![]()
10. Now click on if condition and add Default step from Add Step drop down.
11. Similarly add an update steps immediate after Otherwise setp and this time set Event Approved to false using Set Properties button.
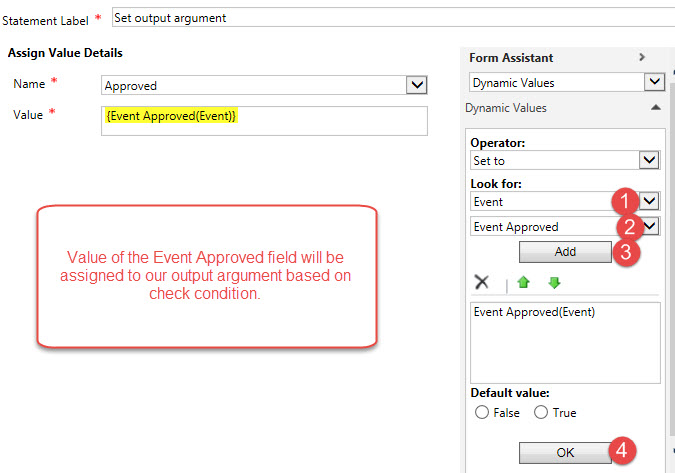
12. Now add a Assign Value step outside of if condition scope and assign Event Approved field value to output argument like following screenshot:
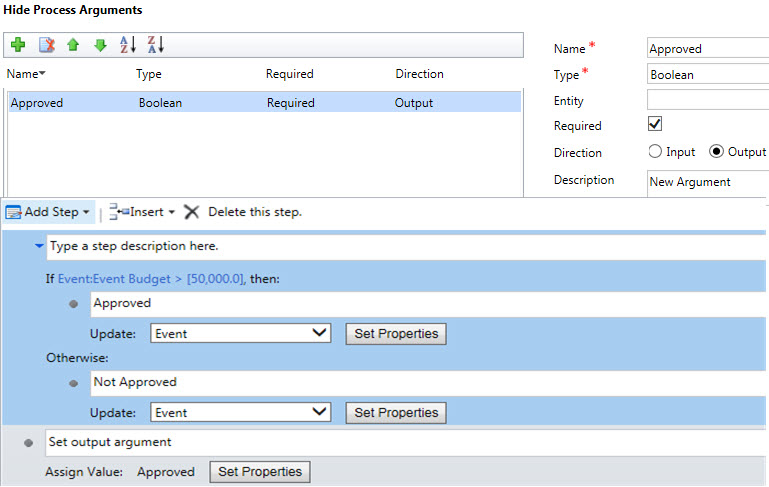
13. Finally action steps should be similar to following screenshot, now activate action using Activate button on toolbar.
Now our action is ready, just make sure to note down name of the action and output argument we during Web API call. As we don’t have any input argument that we need to pass, so we can simply pass our event id and call our custom action using it’s name like below. After that we can capture output argument under data collection.
function Callcustomaction() {
    var Id = Xrm.Page.data.entity.getId().substring(1, 37);
    var serverURL = Xrm.Page.context.getClientUrl();

    var req = new XMLHttpRequest();
    req.open("POST", serverURL + "/api/data/v8.0/dev_events(" + Id + ")/Microsoft.Dynamics.CRM.new_CheckforBudgetApproval", true);
    req.setRequestHeader("Accept", "application/json");
    req.setRequestHeader("Content-Type", "application/json; charset=utf-8");
    req.setRequestHeader("OData-MaxVersion", "4.0");
    req.setRequestHeader("OData-Version", "4.0");
    req.onreadystatechange = function() {
        if (this.readyState == 4 /* complete */ ) {
            req.onreadystatechange = null;
            if (this.status == 200) {
                var data = JSON.parse(this.response);
                if (data['Approved'] != null)
                    alert(data['Approved']);
            } else {
                var error = JSON.parse(this.response).error;
                alert(error.message);
            }
        }
    };
    req.send();
}
We can use above code in script web resource and can call Callcustomaction method on some ribbon button or some form/or field event to test it.
Pingback: Calling Custom Actions using Web API - Microsoft Dynamics CRM Community
My Custom action was working right. But now suddenly it has stopped giving me output parameter. It is giving in return always null.