After release of Dynamics CRM 2016 update 1, we can now enable SLA for other custom and system entities as well. We can enable SLA using Enable for SLA option under entity definition like below for custom and specific system entities:
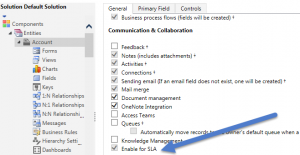
Following are the list of additional system entities apart from case where we can enable SLA:
Let’s implement a simple example and see how we can use SLA with account entity. Consider an example that we want to setup SLA for document verification of the customer, which should be completed after specific hrs of creating customer record into Dynamics CRM. We also need to send a warning email to verification department as a reminder after some time if verification is not done. Let’s say for quick demo we want set document verification due as 1 hrs, so if it won’t be completed within one hr of creating customer record SLA will be failed and we want to send reminder in 1 min.
Now let’s implement a simple example and see how we can use SLA with account entity. Consider an example that we want to setup on SLA for document verification of the customer, which should be completed after 8 hrs of creating customer record into Dynamics CRM. We need to send a warning email to verification department after 4 hrs if verification is not done as a reminder and failed notification after 8 hrs to escalate.
Before creating SLA, we need to create some custom fields on account entity which is required for document verification SLA.
I. Document Verified – Two Options
We need to setup a simple two options field and need to place it over account entity form. If you are new to creating CRM field, please refer this KB.
II. Due – Date and Time
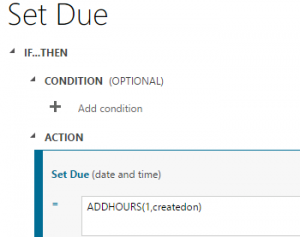
We need to create a calculated date and time field and need to set it’s value by adding 1 hr to createdon field. We can click on edit button next to field type and use formula like below:
III. KPI – Lookup
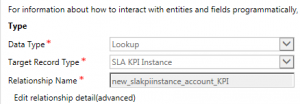
We need to create a lookup field in account entity and need to select target entity as SLA KPI Instance, we required this lookup while creating SLA item. This is only required for entities other than case entity.
Now we have required fields so let’s design our SLA:
1. Navigate to Settings -> Service Management and select Service Level Agreement. Here we need to provide name of our SLA and need to select Account entity under Entity drop down (Account will be only available here once you will mark Enable for SLA checkbox under account entity definition, that we did in first step). If you are new to SLA, I will suggest you to refer this KB first.
2. Select CreatedOn under Applicable From field and keep other field as it is and click on Save under command bar.
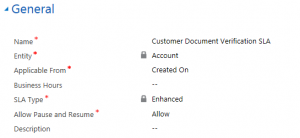
3. Once record is saved, click on + sign under SLA Details sub grid to add SLA items like below and click on Save:
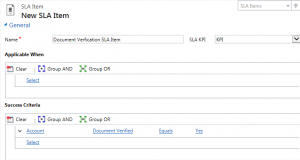
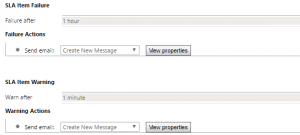
4. Navigate to SLA Item Failure section and configure it like below (For quick result we are setting failure after 1 hr and warn after 1 min). We can send email to verification department as reminder after 1 min and can send failure notification after 1 hr.
5. Save and Close SLA item dialog and Activate our SLA.
6. Click on Set AS Default to make this SLA default for account entity.
In next article we will use this SLA for document verification process. Stay tuned !!
SLA enhancement in Dynamics CRM 2016 Update 1 Part 2


Pingback: SLA enhancement in Dynamics CRM 2016 Update 1 Part 1 - Microsoft Dynamics CRM Community