
Requirement
Add a custom Flyout menu with buttons and identify which button is clicked.
Solution
Sometimes we need to add a custom flyout ribbon button and need to write code depending on the button which is clicked. Normally that is done using menu, but I will be adding button to flyout and using command there to perform action. I will be using Ribbon workbench solution to customize ribbon button which you can download from https://www.develop1.net/public/rwb/ribbonworkbench.aspx or can use from XrmToolBox.
Let see how we can do that.
1. Setup a custom solution and add your entity (just add metadata nothing else)
2. Create a java script web resource with following code
if (typeof (HIMBAP) == "undefined") {
    var HIMBAP = { __namespace: true };
}


HIMBAP.AccountRibbonLibrary =
    {
       IdentifyFlyoutClick: function (commandProperties)
       {
          if (commandProperties.SourceControlId.includes("Test1.Button")) {
                alert("Test 1 Clicked");
            }
            else if (commandProperties.SourceControlId.includes("Test2.Button"))
             {
               alert("Test 2 Clicked");
             }
       }
    };
In above code I am using CommandProperties , we will be passing this parameter from the Flyout button command and it will help us to identify which flyout button is selected, it provides these properties
SourceControlId : The Id value of the Ribbon control that initiated the event.
CommandValueId : A string that is sent with the command event when a button is clicked.
MenuItemId: A reference from a control to the Id of a menu item.
I am checking if button Id contains specific text (Note: We need to include this in our button Ids)
3. Open Ribbon Workbench solution and select your custom solution which include your entity and web resource, we are using Account entity for the demo.
4. Drag Flyout button and drop it on the Form area.
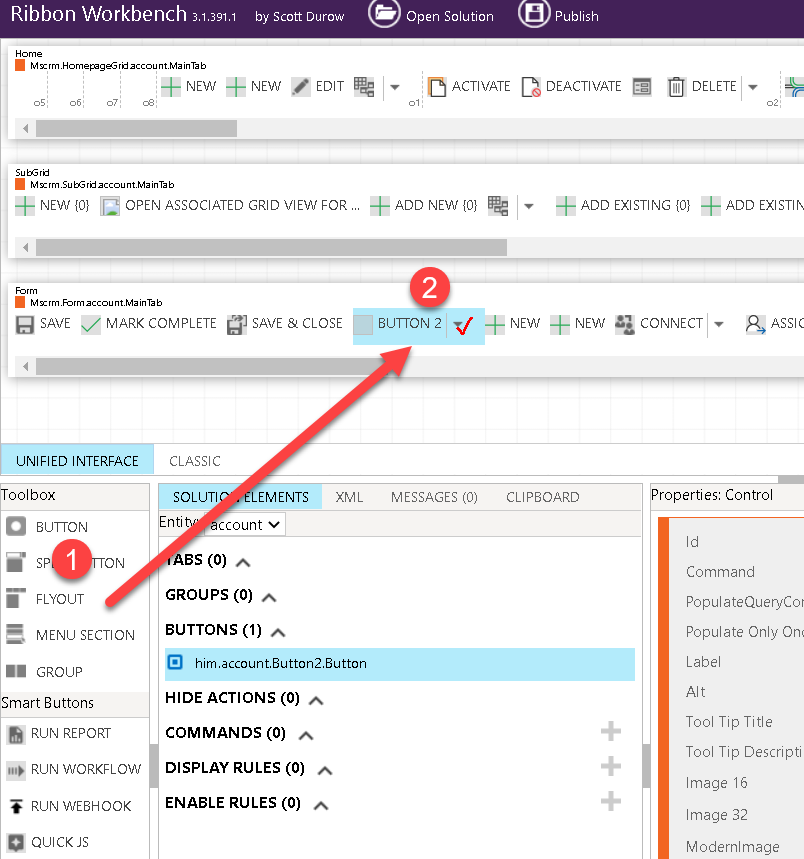
5. Click on + under Command to add new command, change command Id accordingly and add a Custom JavaScript action

6. Select your web resource, provide function name. Click on the Add Parameter button and select Crm Parameter.
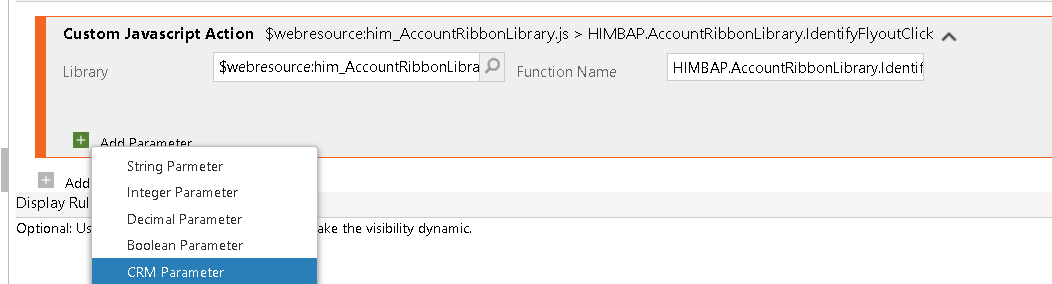
7. Select CommandProperties from available parameter list
8. Now Drag Menu Selection under the flyout (above the line visible in the flyout button)
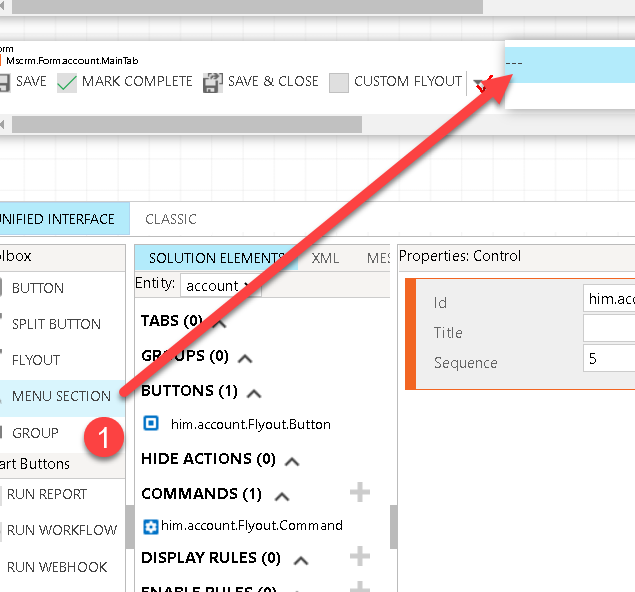
9. Add Buttons under Menu Selection (I have added two buttons)
10. Setup button properties like below (Use command we created in earlier step)

Make sure you are adding button Ids based on your check for example, I have modified button Id to include the text I am validation in my web resource.
Now Publish your changes and you should be able to see flyout like below and when clicked you should see message based on the selection.

Summary
This how we can also use command buttons under flyout and can identify which button is clicked. We can further write script to perform different action based on the selection.
Hope it will help someone!
Keep learning, Keep sharing !!