
Introduction
This is our first article in the series, of Dynamics 365 and Azure function integration. We will be discussing how we can import data from CSV file to Dynamics 365 using an Azure function, during these series we will be discussing the following options,
1. Introduction to Azure Function
2. Connecting Azure function to Dynamics 365
3. Setup Server to Server authentication between Azure and Dynamics 365
4. Deleting blob storage after function execution.
5. Trigger Azure function from Microsoft Flow.
In this article, we will be discussing basic details about azure function.
What is Azure Function?
In a simple definition Azure function is a piece of code which can be executed on demand or can be bound to some event just like traditional SQL triggers, where we have some code that executes because of some event. The beauty of Azure function is its serverless capability which means you don’t need special infrastructure to host and manage it and you need to only pay when your function is executing.
An azure function can be the lifesaver sometimes when we want to keep our Dynamics 365 CE integration logic out of Dynamics 365 CE and we don’t have any infrastructure to host that logic. We can use an Azure function for the different type of integration based on the business requirements. In our series, we are going to discuss importing data into Dynamics 365 with the help of an Azure function. An azure function can be written in Visual Studio and deployed to Azure or we can directly create an Azure function in the Azure portal. In our example, we are going to write Azure Function in Azure Portal. So let’s get started.
If you don’t have a Dynamics 365 CE environment, you can follow our earlier article to setup 30 days trial and can also setup a free Microsoft Azure trial.
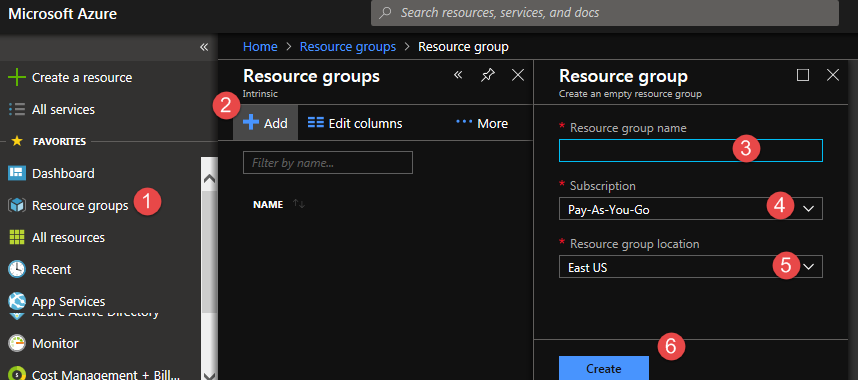
While building any azure component it is recommended to create them under a particular resource group so that it can be managed efficiently as a group. So let’s first create our resource group.
Connect to your Azure environment and create Resource Group using the following steps.
Once the resource group is created, we can add an azure function like following.

Now we have your azure function app and we can add a function which can be associated with the different trigger, for our requirement we are going to use blob trigger which will trigger azure function as soon as a new excel file will be uploaded to azure blob storage, so click on + and create blob trigger
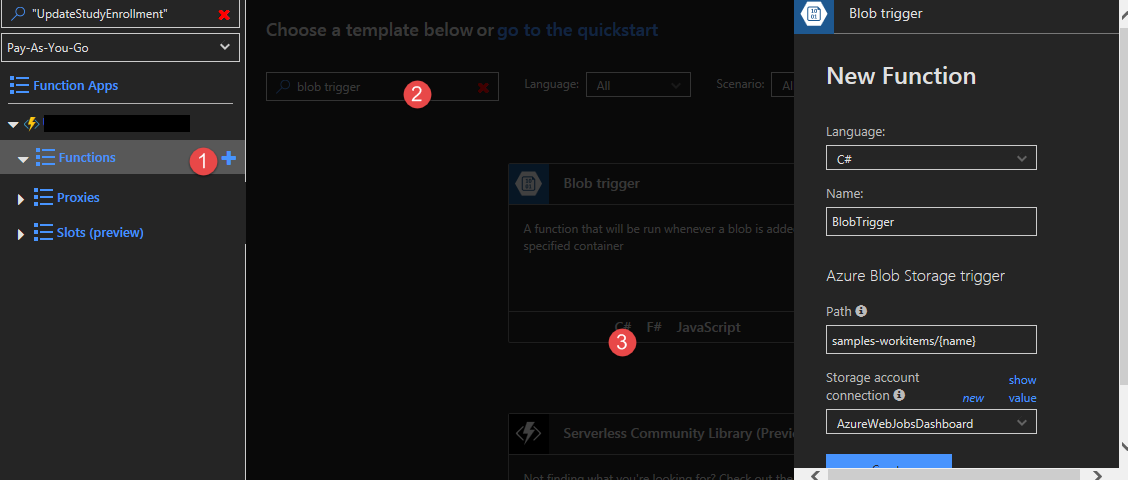
When blob trigger is added, we will get a run.csx file which is a c# script file where we are going to write our code logic.

Our azure function trigger execution will start from Run method which takes the following three parameters.
Stream– This will hold our blob storage (CSV file in our case)
name – This will be the name of the CSV file
TraceWrite – We can use this class to generate logging.
Now we got an overview of the azure function, In the next article we are going to discuss code to read CSV file and upload it to Dynamics 365 so stay tuned !!
Pingback: Dynamics 365 CE and Azure Function Part 1 - Microsoft Dynamics CRM Community
Pingback: Dynamics 365 CE and Azure Function Part 2 | HIMBAP
Pingback: Dynamics 365 CE and Azure Function Part 4 | HIMBAP
Pingback: Dynamics 365 CE and Azure Function Part 5 | HIMBAP
Pingback: Developing Scheduler for Dynamics 365 CE using Azure Function Part 1 | HIMBAP