
Requirements
Let’s say we have requirement where user can put opportunity on hold but before doing he needs to enter comment which should be saved in the opportunity.
In the earlier part we discussed of creating prompt and updating opportunity, in this part we will discuss next items.
Details
We have our prompt page ready now we need to create a web resource and need to add below scripts to call the dialog and create required buttons to open this dialog. We will be adding two buttons one to put opportunity on hold and another one to remove opportunity from on hold so let’s start
Open Dialog Dialog from Button
We need to write script to call our dialog, so we can use following code to open dialog.
function PlaceOnHold(control) {
    var formContext = control;
    var oppId = formContext.data.entity.getId().substring(1, 37);

    var dialogPage = {
        pageType: "webresource",
        webresourceName: "him_OnHold.html",
        data: oppId
    };
    var navigationOptions = {
        target: 2,
        width: 300,
        height: 230,
        position: 1
    };
    Xrm.Navigation.navigateTo(dialogPage , navigationOptions).then(
        function success() {

        },
        function error(errordetails) {
            console.log(errordetails);
        }
    );

}
In the above code we are first getting primary control parameter from the button which will help us to get the opportunity id and then we are calling the dialog busing navigateTo method by passing dialog web resource details and the navigation options.
In the same script let’s add another method to remove opportunity from on hold.
function RemoveOnHold(control) {
    var formContext = control;
    var oppId = formContext.data.entity.getId().substring(1, 37);
    debugger;
    var data =
    {
        "him_placeonhold": false,
    }
    Xrm.WebApi.updateRecord("opportunity", oppId, data).then(
        function success(result) {
          parent.location.reload();

        },
        function (error) {
            console.log(error);
        }
    );

}
We are using updateRecord method and setting our boolean field to false.
Adding Command buttons
We will be adding two buttons one to put on hold and another one to remove from on hold so we need to also create enable rules to hide/show buttons based on the value of our boolean field. so let’s setup enable three rules first.
To show button only on Open Opportunity
We want to use on hold functionality only for the open opportunities so we need to setup on rule to show our buttons only on the open opportunity form. We are going to use value rule like below.

Rule to show/hide OnHold button and Remove On Hold button
We need to setup two another rules which will show button based on the field value.
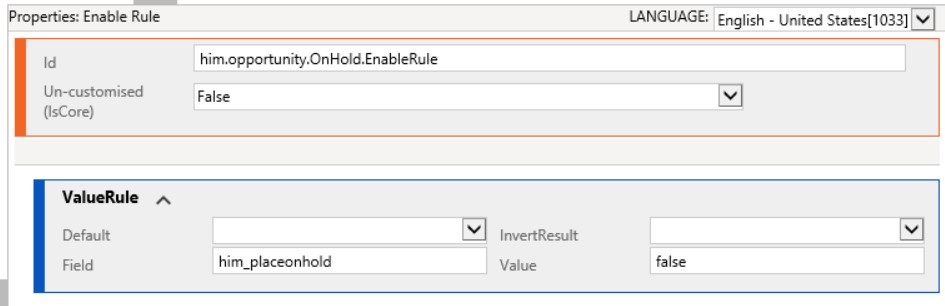
Above rule will show On Hold button when value of the field will be false (opportunity not on hold currently).
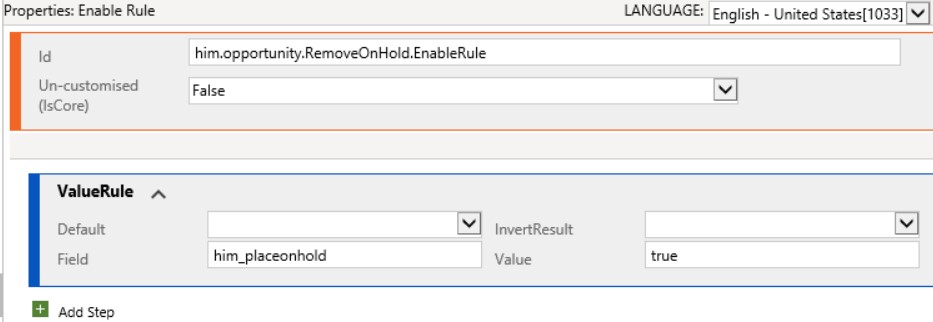
Above rule will show button when opportunity will be on Hold.
Adding Commands and buttons
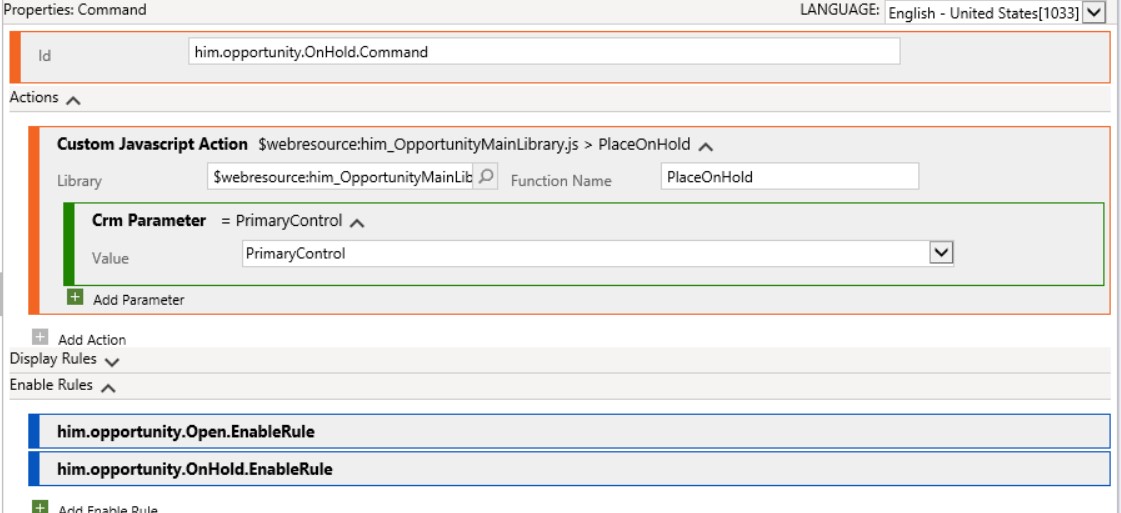
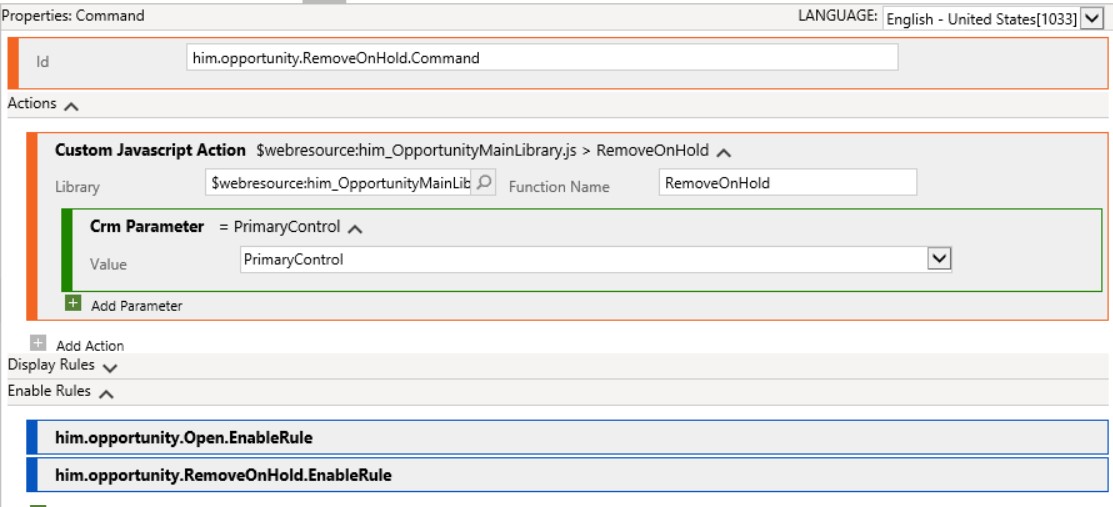
Now we need to add command that we will using under the buttons and we need also refer our enable rules there like below:
For On Hold button
For Remove On Hold button
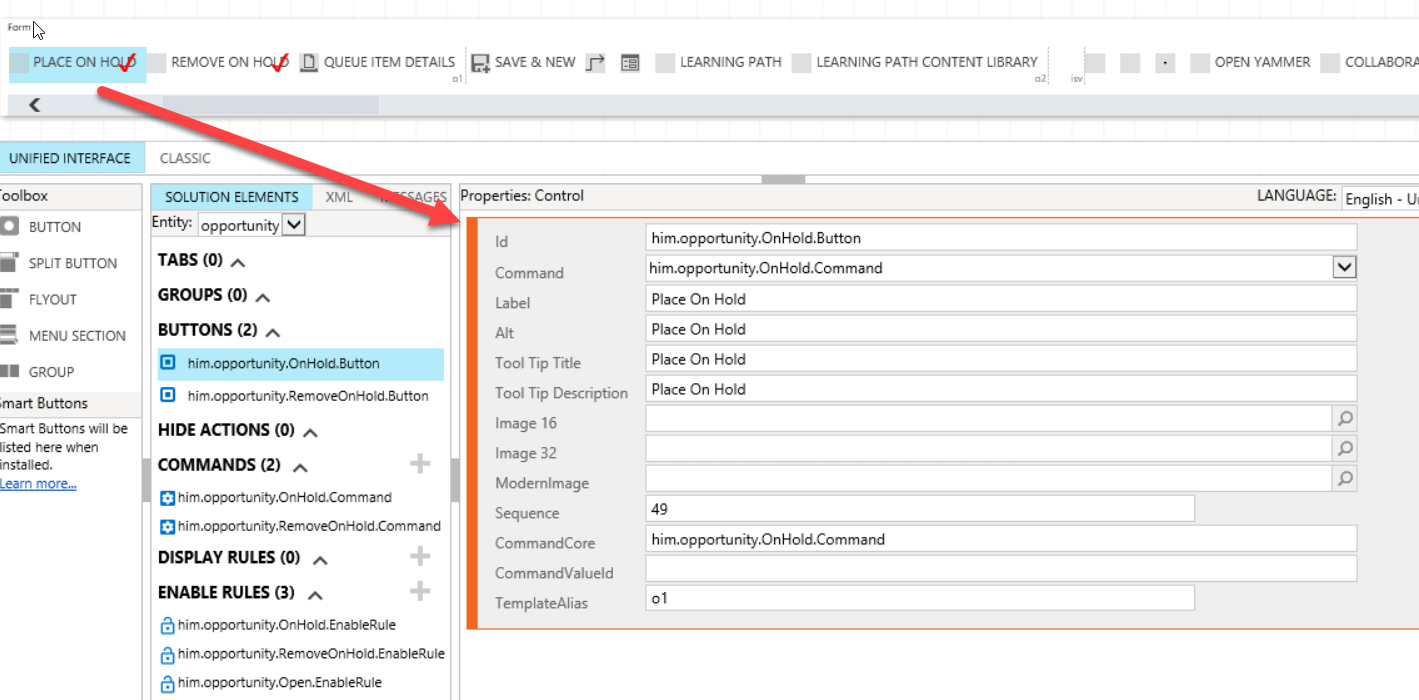
On Hold Button
Finally we need to add button and need to refer commands we created in earlier step
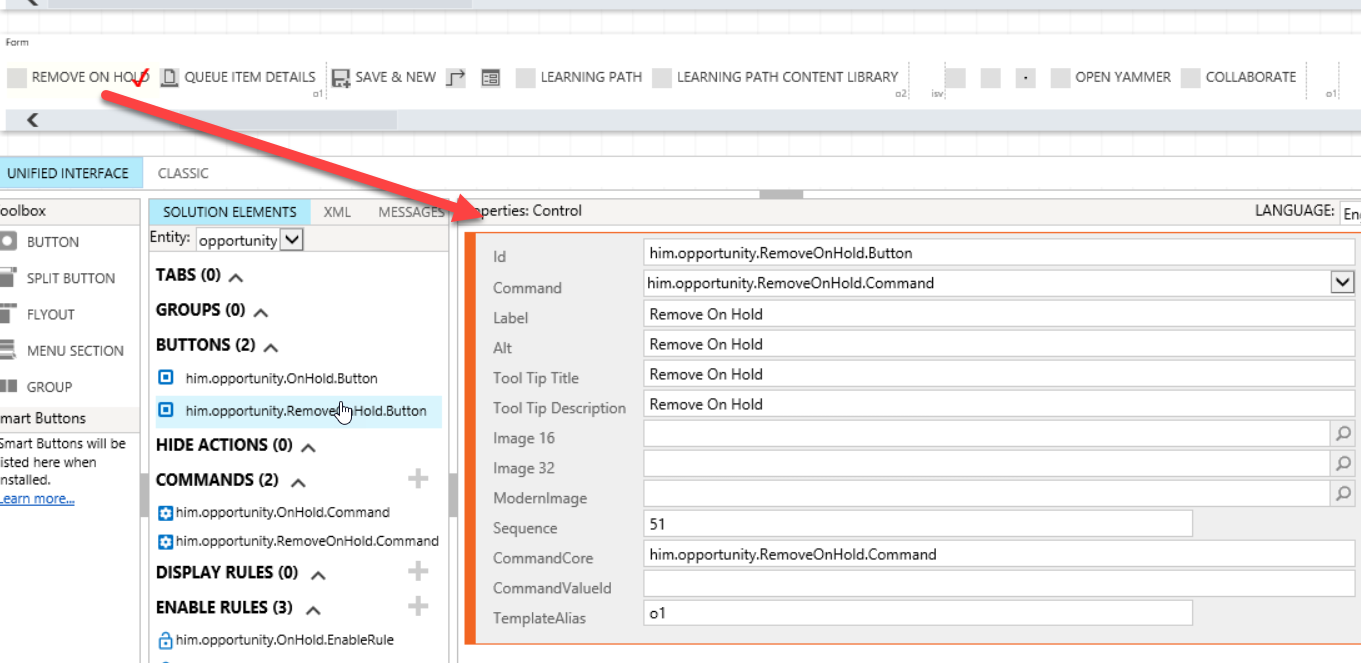
Remove On Hold button
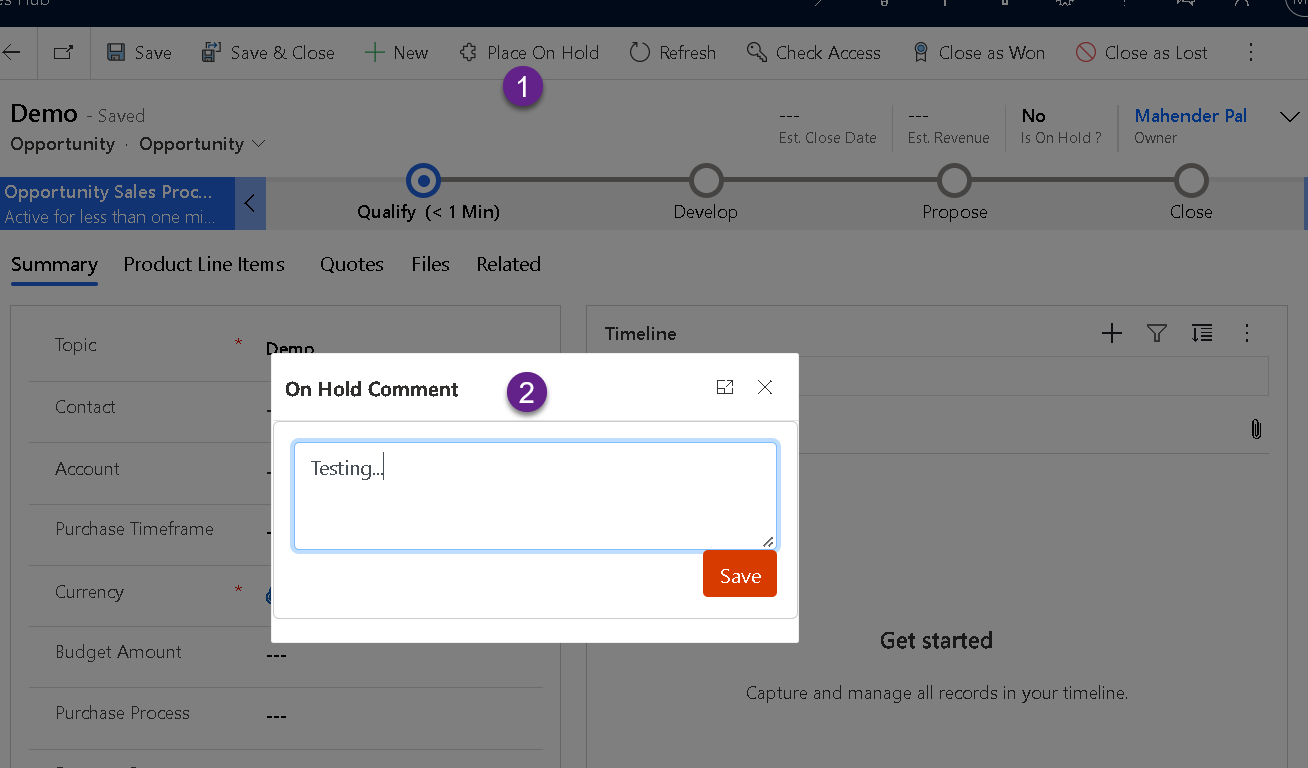
Now publish your changes and when we will press On Hold button we should get prompt like below:
Summary
We discuss how we can add custom bootstrap dialog in D365 and call it from command button.
Hope it will help someone !!
Keep learning and Keep Sharing !!